Start Sentenza Desktop
Welcome in Sentenza Desktop !
After you complete the payment via PayPal, you will be redirected to a page with your download link. If you missed this step for any reasons, don't panic, you will receive your download link and your serial number within 24h to your PayPal email address.
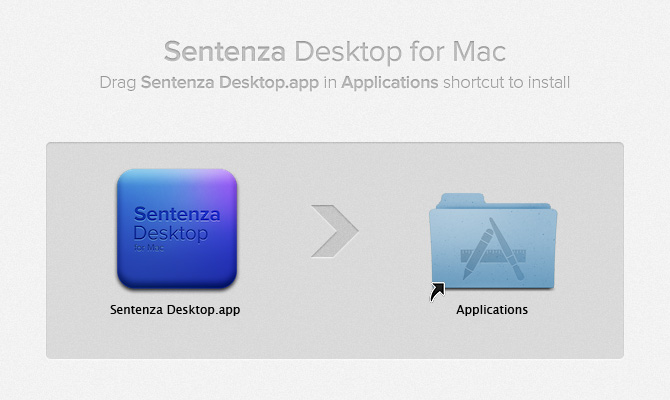
Once the latest version of Sentenza Desktop downloaded, unzip archive and open the DMG file. To install the software, just drag the file Sentenza Desktop.app into the Applications shortcut.
Right now you are ready to launch Sentenza Desktop and build awesome Mac applications :)
Register your license
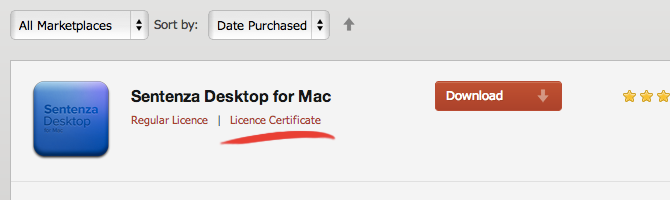
After purchased Sentenza Desktop, you have to get your serial number for license activation. This serial number is in a text file that you can access in the Downloads tab (in CodeCanyon.net user panel or in email confirmation).

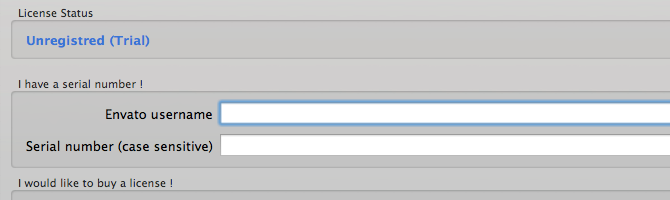
The username to enter is mine on CodeCanyon : ilovemypony
Now open Sentenza Desktop and go in License tab to enter your serial number, then Validate. Cool, now you are a registered user :) If you have some problems at this step, feel free to contact me (via CodeCanyon comment section).
Reset your license
If, for any reasons, you want to reset your license, you have just to delete the licence file located here :
/Users/[username]/Library/Application Support/Sentenza Desktop/License.xml
The Library directory is hidden by default. So, to access you have to open a Finder window and select Go menu and choose Go to folder... ( or keyboard shortcut Cmd + G). Then, in the field displayed, put this path :
/Users/[username]/Library/Application Support/Sentenza Desktop
Save & Open a project
In Sentenza Desktop, project files have for extension .stzdprj. These files are XML-based and can be modified with a basic text editor. Projects files are not encrypted. In your project file, path to resources are absolute. So, if you move a resources file (icon, credits, ...), you will have to modify the path to this file in your project file.
If you have errors while building an application, it's the first thing you have to check !
Keyboard shortcut
Open Project : Cmd + O
Save Project : Cmd + SProject tab explained
Application name The name of your application as it will be shown on the Mac App Store. Don't be too long and avoid special characters.
Bundle identifier The App ID you choosen in the Apple Developer portal. It should look like com.company.application-name.
Version Do I have to explain this ?
Copyright The readable copyright of your application. To add a copyright character, you have just to type (c) or to click on the button at the right of the field. This copyright will be added in the About window (automatically generated).
Main language Select the main language of your application (English, French, ...).
Category Select the main category of your application. If it's a game, you will have to select an option in the Game category menu. Otherwise, just choose Not a game.
Game category Select the category of your game application. Only if your application is a game.
Content tab explained
Main directory Select the root folder where your HTML files are stored. The homepage must be named index.html. This is extremly important. If you want to include an help file in your application, you have just to place a file named Help.html in the root directory.
Icon The main icon of your application. This icon must be in 1024x1024px. I recommend this great tool to build easily your high-def icon : Icns Builder
Credits The RTF file containing credits and infos about your applications. It the content exceed 5 lines, it will be automatically converted into a scrollable area in the About window.
Settings tab explained
Title bar Title shown in the title bar of the application (displayed few seconds while homepage index.html loading). Then, it will be overridden by the HTML title tag of the page.
Show a title bar Display a title bar in your application. The title bar is the gray bar where close, minimize and maximize buttons are displayed. If you disable the title bar you will can not move the window.
Only a close button Display only a close button. Minimize and maximize button will not be displayed at all (even grayed).
Close button Display a close button (red rounded) in the title bar. In any case the application can be left via keyboard shortcut Cmd + Q.
Minimize button Display a minimize button (orange rounded), to send the window in Dock.
Maximize button Display a maximize button (green rounded), to zoom the window in full height/width (toggle).
Width (px) Choose the width (in pixels) of the window at launch.
Height (px) Choose the height (in pixels) of the window at launch.
Resizable Enable this option to allow the manual resizing of the window. Caution, your HTML content must be responsive to be perfectly displayed.
Launch maximized Open your application in full height/width.
Hide others at launch Hide all others active windows at launch of your application (not recommended).
Enable Back/Forward Disable this option to disallow navigation via backspace keyboard to go back ; and Cmd + → to go forward.
Enable scroll bounce Disable the elastic scroll bounce (only on Mac OS X Lion and newer).
Enable LocalStorage Enable HTML5 LocalStorage to save easily some datas (for example, saving game best scores).
Enable fullscreen Enable this option to use the fullscreen mode (native). A new button (two arrows up and down) will be displayed in the title bar on the right side. Caution, your HTML content must be responsive to be perfectly displayed.
Enable JavaScript Enable this option to active JavaScript in your application. If disabled, no JavaScript code can be executed in your application.
Enable WebGL Enable this option to active WebGL in your application (still a bit experimental but works well from my tests).
Open target _blank links in default browser Open links with target="_blanks"
Ask before exit Display a message confirmation before exit. This message is automatically available in English, French, German, Italian and Spanish.
Quit application at window close Enable this option to quit the application by clicking the close button (red rounded) or by keyboard shortcut Cmd + W. This option doesn't override the message confirmation before exit.
Enable Dock click to re-open Enable this option to allow user to close the window and re-open via a click on the application icon on the Dock. The window states is fully saved.
Help included Enable this option if you want to include a help file in your application. You have just to put your HTML help file (named Help.html) in the root folder (where the homepage index.html is located). The help file is accessible via Help menu and will be opened in the default internet browser.
Enable custom User-Agent Check this box if you want to use a customized user-agent.
User-Agent Use a customized user-agent rather than the default WebKit user-agent.
Compilation tab explained
Output directory Select the directory where your application will be built (.app, .pkg, .xcarchive).
Codesign for Mac App Store Check to enable codesigning for Mac App Store while compilation. This function is required to build a .pkg or a .xcarchive package. Apple Developer Account required. If you don't have an Apple Developer Account, you can uncheck this box and compile a not signed application. You will have to distribute this application by your own ways.
Application Sandbox Required to submit your application on the Mac App Store. The Sandbox will "listen" all functions and require authorization from the user to access the file or folder. Some APIs can be not Sandbox compliant. Read the APIs documentation for more infos.
Full Name The full name used to register your Apple Developer Account (as it shown in the Keychain utility).
Certificate name The name of the certificate to use for compilation. For example, to build an application alone you will use 3rd Party Mac Developer Application ; and to build a .pkg package you will use 3rd Party Mac Developer Installer. If you are not sure or if your are lazy, just type Default, the engine will choose for you.
Provisioning Select the path to the .provisionprofile file corresponding to the bundle identifier of your application.
Outpout Log Do I have to explain this ?
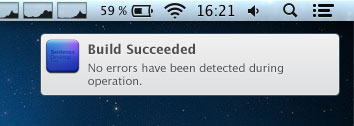
Build Application Build the application (.app) with selected settings. Codesign or don't code sign, you choose. When compilation is finished, a notification will be sent to your notifications center.
Build .pkg Package Build the application (.app) and a .pkg package with selected settings. The .pkg package can be submited to the Mac App Store via Application Loader ≥ 2.8 (installed by default with XCode).
Build .xcarchive Package Build the applicaton (.app) and a .xcarchive package with selected settings. The .xcarchive package can be submited to the Mac App Store via XCode as archive. At the end of the compilation you can click on Output button to open the XCode Archive directory. You will have just to move the .xcarchive package in this directory, and then using the XCode Organizer to check and/or submit your app to the Mac App Store. So easy !
Output Click this button to open the output directory (where your .app application has been built) and the XCode Archive directory.
Codesign your application
Codesigning your application is a required step to submit your application to Apple. To do this, you need an Apple Developer Account ($99/year). After enrollment you will get a certificate at your personal name, and an access to the Apple Developer portal where you will can generate App IDs and Provisioning Profiles for your applications. All is well explained in the developer portal, don't be afraid.